Wednesday, October 31, 2012

fall vegetable soup

another delicious fall soup recipe with butternut squash used in a different way. once you have prepped your ingredients, the soup comes together in less than 15 minutes! here the squash is not the star, but is one of many ingredients to make a hearty fall vegetable soup.


this recipe is simple and straightforward. start off by prepping all of your vegetables. rip the kale into pieces (remove any thick stems). mince garlic, chop onion and potato, slice carrot and celery, and cube the butternut squash.


add 1 tablespoon of olive oil to the pan (don't mind the burn marks on mine!) and heat over medium low heat. saute the onions and garlic until they start to become translucent and lightly brown.


next add in the stock. i use part chicken and part vegetable stock to develop a better, more unique flavor. add in the prepped carrot, celery, potato and squash.


 once this comes to a boil, add the tomato paste and simmer for 3 minutes.


season the soup with 1/2 tsp ground black pepper, 1 tsp dried oregano, and salt to taste (depends on how salty your stock was).

after the 3 minutes of cook time is up, add in the orzo, kale, and kidney beans and simmer for an additional 5 minutes. 


after 5 minutes, check your vegetables to make sure they have cooked to your liking and you are done! ladle into bowls and enjoy. 


you can stash the soup in the fridge and reheat as needed, note that the orzo and veggies may soak up a little extra liquid, making the soup thicker.


fall vegetable soup with kale and butternut squash
 inspiration from: quick fall minestrone

ingredients:

1 tbsp extra virgin olive oil
2 cloves garlic, minced
1 small onion, chopped (about 1 cup) 

4 cups chicken stock
2 cups vegetable stock
1 carrot, chopped (about 1 cup)
1 stalk celery, sliced (about 1/2 cup)
1 medium russet potato, scrubbed well and cubed (about 2 cups)
3 cups cubed butternut squash (about 1/2 of a 2.5 lb squash)
1/2 tsp black pepper
1 tsp dried oregano
salt to taste (try about 1/4 tsp if you need it)

2 tbsp tomato paste
1/2 cup orzo (or another small dry pasta)
1.5 cups cannellini or kidney beans (rinse if using canned)
4 cups kale, stems removed and ripped into smaller pieces

directions:

1.   heat olive oil over medium low heat, and add onions and garlic. saute until translucent and lightly brown.

2.   add in chicken and vegetable stock, as well as the carrot, celery, potato, and squash. season with pepper, oregano, and salt. bring the mixture to a boil, add tomato paste and then turn the heat down to a simmer for 3 minutes.

3.   stir in the orzo, kidney beans, and kale and simmer for an additional 5 minutes. taste to be sure the vegetables are cooked to your liking, and it is ready to serve.

tips:

- feel free to mix up the vegetables you use! i have used green beans in place of celery, and sweet potato for part of the white potato. Cannellini beans add a great color and either canned or freshly chopped tomatos are delicious as well.

- store in a tightly sealed container in the fridge for a few days. the pasta and vegetables may absorb extra water during storage. if the soup is too thick when you reheat it, feel free to add a little water or stock.

Saturday, October 27, 2012

butternut squash and apple soup

my new favorite fall produce has to be the butternut squash. roasting it cubed or in slices brings out the sweetness to balance out a savory entree, it works wonderfully as an addition to vegetable soups, or it stands out as the main flavor in this butternut squash and apple soup.


if you start out with a large squash, you may not need to use the whole squash. about a 2 lb squash should give you all you need for this recipe. aim for about 5-6 cups cubed. even if you alter the proportions of the ingredients, it will still taste awesome, so don't get too caught up with the measurements.

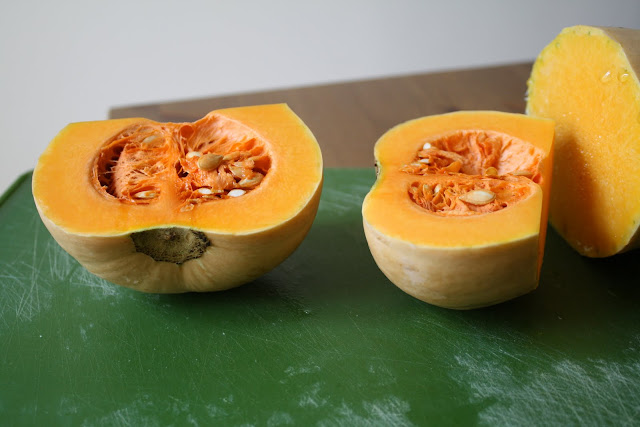
the hardest part of the recipe is cutting up the squash, so use your sharpest knife. cut the squash in half, separating the bulb from the top of the squash. start with the bulb and slice it in half. scoop out all the seeds and strings.


peel both the bulb and the top part of the squash. i find that its easiest to peel the bulb part crosswise because the peeler works well on the curve.


for the top part of the squash, slice it into "planks" first:


then take a few planks at a time and slice into sticks:


then you can slice crosswise and you will have cubes of squash:


for the bulb, you can cut into slices first, then cut crosswise into chunks.


prep the other vegetables in the recipe: chop the onion, slice the celery, chop the carrot, peel and chop the apple.


start off sauteing the onions, adding some herbs if you choose (i used sage and thyme). if you want a smooth looking soup, keep the herbs in whole sprigs so you can remove them easily before blending. add the carrot and the celery and cook until they start to soften. then, add in the cubed squash and the broth to the pan.


simmer for about 25-30 minutes until the squash and vegetables soften. remove from the heat and let it cool slightly. next, its time to blend. you can use an immersion blender right in the pot, or you can use a regular blender. ladle about half of the squash mixture into the blender, making sure the leave plenty of space at the top.


now this is important! be sure to hold the stopper on the lid of your blender ajar (pictured below), so that the steam can escape while blending. also firmly hold the lid on. this is why you want to leave plenty of space, to prevent splashing squash all over your walls. pulse the mixture until most of the chunks are broken up, then process for about 15 seconds straight until it becomes a smooth puree. set aside the first batch and repeat with the second half.


 the puree will be quite silky, and you can mix the two batches together after blending.


you can serve immediately as warm soup, or stash it in the fridge for a couple of days. it reheats well. if desired, garnish with some herbs or spices for a nice presentation. i added some fresh grated nutmeg and sage:


perfect meal for a cold or rainy day!


butternut squash and apple soup

2 tbsp olive oil
1 small onion, chopped
1 stalk celery, sliced
1 cup carrot, chopped
sage, thyme, or other herbs
5-6 cups butternut squash, peeled and cubed
1 large apple, peeled and cubed (a tart, crisp apple such as granny smith works well)
3 cups chicken or vegetable broth
1 cup water

instructions:

1.   add the 2 tbsp olive oil to a soup pot (or a large skillet, with high sides) and heat over medium low heat. saute the onions until they start to soften, and add the sliced celery and chopped carrot. if desired, add a few sprigs of herbs to the pan as well.

2.   once the carrot and celery start to soften, add to the pan the cubed butternut squash, the apple, the broth, and the water. simmer covered for 25-30 minutes until squash softens.

3.   once squash and vegetables are soft, either use an immersion blender to puree the soup mixture, or use a blender to puree the soup in batches, being careful to let the steam escape while blending (see tips above). if you are using a regular blender, i recommend letting the soup cool slightly before blending.

4.   serve pureed soup immediately while hot into bowls, or store in the fridge for a few days. you can easily reheat it on the stove over low heat or in the microwave.

Sunday, October 14, 2012

classic basil pesto

fall has definitely hit new york city, bringing cold breezy weather with it. while i welcome the beautiful season and its changes, our window garden is one step closer to hibernation. we grow a variety of herbs, and our basil plants especially thrived this past summer. what's one to do with a surplus of basil that won't last much longer? try making a couple batches of classic basil pesto, and follow the added tips to freeze some for meals later on.


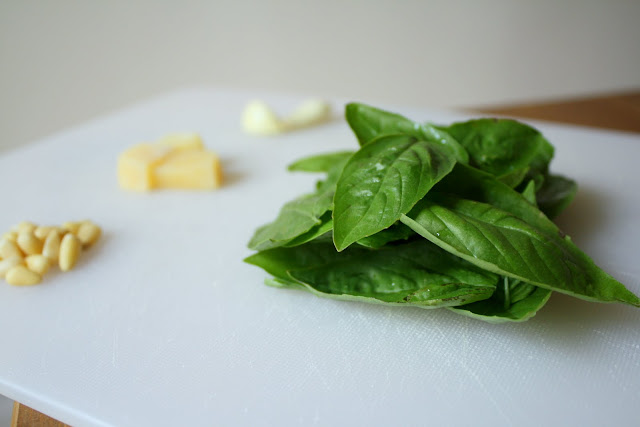
start with your basic ingredients: basil, pine nuts, a salty italian cheese, garlic, olive oil, and salt. simple and classic.


start with your pine nuts

 
toast them in a skillet until lightly browned, like this:

 
while the pine nuts cool slightly, pulse your cheese of choice until fine. i used pecorino here, but parmesan is also a good choice. 


 set aside cheese in a bowl, and pulse pine nuts until finely ground.


set pine nuts aside with the cheese, and add your garlic and salt to the food processor. pulse a few times to chop the garlic


add the basil to the bowl, along with half of your olive oil. pulse and then grind continuously to break up the leaves.


drizzle in the remaining olive oil, with the processor running continuously.


add the cheese and pine nuts that you set aside earlier to the work bowl and process about 10 times to blend. 


that's it! your pesto is done and ready to be mixed with pasta, spread on a sandwich, or any other possibilities.


to freeze your pesto for later, i recommend a silicone tray. divide your pesto up among the molds, leaving a little room for extra olive oil. drizzle a little olive oil on top of each mold.


freeze pesto overnight, or until cubes are solid. remove from the tray and store in freezer bags.


recipe from: cuisinart miniprep recipe book

classic basil pesto with pecorino cheese and pine nuts 
makes slightly over 1/2 cup pesto

ingredients:

1 oz pecorino cheese, cut in 1/2 inch pieces
1/4 cup pine nuts, toasted
1 clove garlic
1/4 tsp salt
1 cup packed fresh basil leaves
1/3 cup extra virgin olive oil

directions

1.   rinse and dry 1 cup packed basil leaves. toast the pine nuts in a skillet for 3-5 minutes on low until lightly browned. set aside to cool.

2.   pulse the cheese in the processor a few times on chop. process continuously for about 15 seconds until finely ground. remove cheese to a bowl and set aside. pulse the pine nuts in the processor a few times on chop. remove into bowl with cheese and set aside.

3.  add the garlic to the processor, and chop until minced. add the fresh basil leaves, salt and 1/2 of the olive oil (so about 1/6 cup). pulse a few times on grind mode, and the grind continuously until basil leaves are chopped up (about 15 seconds). run the processor on grind mode while you add the remaining olive oil slowly, through the holes on the lid of the work bowl. keep processing for about 10 seconds after all the oil is added.

4.   add the reserved cheese and pine nuts to the processor and pulse a few times, until all ingredients are combined. the pesto will develop a better flavor if you let it sit for about 30 minutes before using.

5.   to freeze pesto (optional), portion the pesto into a silicone ice cube tray, leaving some room on top. top off each mold with olive oil. wrap tray in saran wrap and freeze tray overnight, or until the pesto is frozen solid. remove cubes from tray when ready, and store in freezer bags until use.


tips:

when ready to use, either thaw the pesto in the fridge, or throw it into some hot pasta and stir.

don't use your regular ice trays for the pesto freeze process. my molds retained some of the scent after washing. don't want to dedicate a tray to savory uses? try freezing your pesto in a log and cutting off portions as needed.

this recipe is perfectly sized for the miniprep, but feel free to scale up if you have a bigger processor!


Monday, October 8, 2012

pumpkin puree and pumpkin gut bread


fall is my favorite season, and fresh pumpkin is one of the big reasons. i discovered how delicious homemade pumpkin puree is a few years ago, when i decided to buy a pie pumpkin from the farmer's market. the pumpkin puree is silky and has a fresh, bright flavor. i could even eat it plain, straight from the spoon. try it yourself, and you will end up with a lovely homemade pumpkin puree, pumpkin gut bread, and you can roast the seeds to boot!


start off by picking up a sugar (pie) pumpkin from your local market or grocery store. i hear smaller ones are sweeter, and they are certainly more manageable so i would start with one around 2-3 lbs.


cut the pumpkin in half, and break or cut off the stem. 


Using the side of a spoon, scrape out all the guts and seeds and relive your childhood pumpkin carving days. don't discard them though, there is a use for both!


once your pumpkin is scraped out, place it face down in a pan (i used a glass pyrex 9" x 13") and pour in about 1/4" of water.


roast it in the oven for about 40 minutes for a 2.5 lb pumpkin. you may need a little extra time if yours is larger. a good indication is to gently tap the top of one of the halves. if this leaves an indentation, your pumpkin should be soft enough to puree.


remove the pumpkin from the water and let it cool slightly. your pumpkin skin should peel right off at this point, and you can add the bright orange flesh to the food processor. 

 
if the skin doesn't peel easily, you can use a spoon to scrape out the flesh.
 

i used my miniprep to puree the pumpkin in about 4 batches, processing for about 30 seconds each. (my friend's immersion blender was also up to the task, if you don't have a food processor)


  if you plan to use your puree for pie, i recommend that you strain your puree. scoop it into a fine sieve, and let it strain over a bowl for about 30 minutes, or until you see the excess liquid has drained out.


taste it, use it in bread, pie, or any other combination of spiced fall baked goods!


now, back to the guts... remember how i said to save them? we are going to use them up in this delicious recipe for pumpkin bread.


separate your guts from seeds. 

chop the guts as finely as you can, until you no longer have stringy pieces.


mix the pumpkin with the other wet ingredients, and then add the spices (shown below) and other dry ingredients to this mix. 


stir until just combined, and then pour into a parchment lined loaf pan. sprinkle with cinnamon, and if desired pepitas or chopped pecans.


bake for 30-45 min (depending on pan size, and your oven) until a toothpick comes out with a few moist crumbs.


it makes a soft-textured, moist, and spicy loaf that no one will ever guess was made with pumpkin guts!


homemade pumpkin puree
makes a scant 2 cups from a 2.5 lb pumpkin

ingredients:

1 sugar pie pumpkin, about 2-3 lbs
water for pan

directions:

1.   preheat oven to 375 degrees F. cut your pumpkin in half, breaking it open so the stem ends up on one side. cut off the stem, or break it off.

2.   scoop out the seeds and guts. take your hollowed out pumpkin halves and place them face down in a baking pan. add water to pan until it reaches about 1/2" up the side.

3.    bake in oven for 30-45 minutes or until the pumpkin flesh is soft. you can test for doneness by tapping softly on the top of one of the halves with a utensil. if it leaves an indent, your pumpkin should be done.

4.   use a food processor or immersion blender to blend the pumpkin into a silky puree, trying to get all of the lumps. 

5.   if desired, drain the puree over a fine sieve until it has released excess liquid (at least 30 min). i recommend this step if you are using your puree to make a pie.


pumpkin gut bread
makes one loaf (8.5 x 4" or 13 x 5" loaf)

edited from: diana's famous pumpkin bread

ingredients:
1 cup pumpkin guts, chopped finely into small pieces
1 cup white whole wheat flour
3/4 cup oat flour or AP flour
1 tsp baking soda
1 heaping tsp cinnamon
1 tsp nutmeg
1/2 tsp ginger
1/8 tsp cloves
1/2 tsp salt
3/4 cup brown sugar
2 eggs, beaten
1/4 cup water (or if your puree has drained you can use this)
1/2 cup canola oil
extra cinnamon for sprinkling
pepitas for sprinkling (optional)

directions:

1.   preheat oven to 350 degrees F. mix together the dry ingredients: flours, baking soda, spices, and sugar. to this, add your pumpkin guts with the remaining ingredients: eggs, water, and oil. mix the two together until combined.

2.   pour the batter into a parchment lined loaf pan. either 8.5 x 4" or 13 x 5" works well. bake for about 30-45 minutes. (my 13 x 5" took 32 minutes and the 8.5 x 4" pan took 45 minutes)

3.   take out pan when bread it done, it will spring back when you press it lightly, and a toothpick should have moist crumbs, but no batter. let cool completely before slicing. store wrapped in saran wrap.